We are a new team and not all that good, how do I create a positive atmosphere and keep the players motivated and enjoying the game as they play.
The biggest deal here is that you don't worry and you make a huge deal out of the score not being important. What is important is each accomplishment is what you celebrate and just like hitting the ball and running or picking it up and throwing. Your letter indicates that your worrying about motivation, when in truth just playing to be all the motivation they need not sure hundred percent what you mean by motivation. But little kids like that normally just love to play, let them play in different positions and set goals that you know they're going to accomplish. Just like this past Sunday we had three goals--- for six out of the 12 players to hit the ball, to make one out in the field, and scored one run and we were able to do that because of the way the league is built - inning consists of three outs, seven runs, or batting through the order when we change. We know that were going to accomplish almost every one of these and this week we will have a little different set of goals, but that's what were you tell them are going to try to do and have fun. Then after the game we will make comment immediately away from the parents. So is just you and the coaches and the players talking to each other about what you got accomplished today and how much fun it was. Make no mistake about it all you're doing is creating organized play with this age group you're not creating baseball players you're creating social skills, fun, and organizational aspects that they will need to work with. But winning and losing is the last thing that needs to be even brought up.
The very first year I coached we were eight year olds in a 10 under league we were 0-44, and the thing they remember to this very day is that we went to Pizza Hut and celebrated a rainout. but by the time they were 12 years old we were 2nd in the BABE RUTH WORLD SERIES for 12 and under.
Let me know what you think and hope that I've created some thought process.
Coach Arnald Swift
Below is a stock answer for concentration and pitch recognition along with being confident at the plate.
Try it and I believe that the player will start to hit and catch better.
For catching take way his glove and play catch with a foam ball or plastic ball then get a baseball and do the
drill I talk about below. We have to get over any fear and use to the ball. Believe it or not when they first
start the glove just gets in the way so eliminate it most of the time.
As simple as this sound get a piece of plywood, prop it up at and angle, have him or us throw the ball up the
board and then field it as it rolls back down.
The for fly balls or high throws, throw the ball onto a roof and catch it as it comes off, it is fun and teaches
throwing and eye hand coordination. Use a rubber ball or tennis ball gives a safer aspect to it if you so
desire.
Coach Arnald Swift
Common Issues With Young Baseball Players & What To Do As a Coach
If you are coaching young baseball players these will undoubtedly be three issues that you will encounter quite frequently. Hopefully these tips give you a good idea of how to correct things and get your young troops back headed in the right direction with their skill development. If you have any of your own coaching techniques or other common issues you encounter, please share them with us in the comments section below. Thanks for your time!
There are many different technical issues that young baseball players have when starting out but some seem to be a lot more common than others. Here are a few problems that are consistent with most kids and what you can do as a coach and/or parent to help steer them in the right direction.
Throwing
Every person that’s ever thrown a ball has their own technique that is slightly different in some way than everybody else’s. However, even though everyone throws differently, many still have the same problems. The most common problem that I see with kids throwing the baseball is the direction their body is going in when they throw. What typically happens is players will direct their momentum towards their glove side, instead of having it all going towards their target. This can happen for many reasons but typically it has to do with their glove getting away from their body during the throw and pulling them away from their target instead of towards it. Once your glove starts moving away from your body as you throw, it’s likely that your momentum will follow in the same direction. The consequences for your momentum being directed in other places than your target are typically a loss of velocity as well as accuracy. So make sure that your youn baseball players are directing momentum towards their target whether it be a catcher or a teammate in the field.
Hitting
There are very few techniques in sports that are debated more than hitting a baseball. But one consistent technique that’s taught is that when a player strides, it’s best for the stride to be going straight. A problem with a lot of younger hitters, however, is they will step away (usually opening up). Once you step away, your front shoulder will open up and allow your head to pull off, which will also increase the likelihood that your bat will not be in the strike zone as long as it could be. So before adjusting any technique of a hitter, make sure their stride is at least going forward to give the rest of their body a chance to do other things efficiently.
Fielding
A very common mistake that kids make while fielding a ground ball is where they position their glove when picking up the ball. What most kids like to do is put their glove straight down between their legs. The problem with this is when the ball is on its way, you cannot see your glove and watch the ball at the same time, meaning you can't see the ball into your glove (or as close as possible...sometimes it can be too fast to track right in). So you have to get your glove out in front of you so that you can see the ball in (like Dustin Pedroia in the picture above). This technique will also help you adjust to bad hops by giving you the opportunity to move your glove back to your body if necessary. It’s a lot easier to adjust bringing your glove in than adjusting it out.
Kevin Hussey
Hitting (Hitting off a Tee)
Favorite part of practice is batting practice, where they get to see how hard and far they can hit a baseball. The problem with batting practice is how kids handle it. A lot of kids see batting practice as a homerun derby with the ball perfectly placed each time (or waiting for a perfectly placed one) and swinging for the fences. When you hit off a Tee, your goals can be made more appropriate for trying to become a better hitter and can be made more realistic to game situations when done correctly. The goal of hitting the ball off the tee is to try and square up the ball as much as possible because almost all results will be the same anyways. Hitting off a tee allows you to forget about your surroundings and concentrating on increasing your strength and using proper technique. Placing the Tee in different locations that represent where an actual ball may be pitched to you - raise and lower the Tee, place it closer to you and further away - can help you learn what adjustments your body will need to make to square up on a ball based on the pitch location.
Ground balls (Using a Wall)
Taking ground balls seems like it would be at least a two person activity but it doesn’t need to be. If you’re in a position where you can only practice by yourself, try throwing yourself groundballs off the wall (among other ideas). You don’t need to have a hard ball to practice this. If you have any type of ball that bounces you can work on almost all the skills involved with picking up a ground ball. You can still learn to read different types of hops while regulating your speed to the ball allowing your body to be in a good fielding position. The best part of throwing a ball off the wall is you can adjust every throw to cater to your defensive needs. The only thing you can’t really simulate is being able to read a ball off the bat, but learning how to get your body in a good fielding position will ultimately help you with that as well.
Pop ups (Using a Tennis Racket)
This is a little easier with a partner, but catching pop ups generally requires a coach that’s capable of hitting pop flies to their target and this can be very difficult for inexperienced coaches and an inefficient use of time. It can make pop ups a lot easier if you try it with a tennis ball and racket. Using a tennis racket and hitting the ball up in the air is a great way to consistently hit pop ups at your target. Along with being able to hit them extremely high and accurate, the tennis ball will be influenced by the wind making it a challenge for the person receiving them. This drill works great for catchers pop ups.
All of these drills will help you practice your skills on your own and are just a few examples of many ways you can work on your own. When trying to become a better athlete, all of your most important work will get done on your own so don't wait for a team practice or a bunch of teammates to get together. Try and find different ways that you can become great at practicing baseball without relying on anyone else.
I'd love to hear about your favorite "solo" drills. Please feel free to share them in the comments below so others can benefit from them.
Kevin Hussey
2 Baseball Pitching Drills for Better Accuracy
Some of the most important baseball pitching drills focus on accuracy and placing the ball where you want it to be.
The following drills challenge athletes to continually improve their ability to get the ball where it's intended to go. Drills can be adjusted depending on the age and playing level of different teams and players.
Baseball Fielding Drill for Kids
- Bullseye In the bullseye drill, players throw the ball into an ever-decreasing bullseye. Coaches should tape off a square bullseye, either into a padded wall or a throwing or batting cage.
- Inside each square, there is a smaller square, with a total of five squares.
- The size of the bullseye depends on the age and playing ability of the team you are working with, but it should be challenging.
- Players must throw three to five balls back-to-back inside the bullseye before the coach removes the outer-most piece of tape, thus decreasing the size of the bullseye.
- The number of back-to-back balls thrown into the bullseye is also a decision the coach makes, depending on the age and playing level of the team.
More: 3 Fun Baseball Drills For Kids
Kneeling Partner Pitches
- Each player needs a partner. Both partners kneel on the ground, both with gloves, but with only one ball. The distance between the players is up to the coach, and can be extended periodically during the drill to make things more difficult.
- Each pair pitches back and forth. The pitch is considered "good" if the catcher does not have to extend his arms out to his sides in order to catch the ball.
- the catchers extend their arms, the pitcher gets a point. If the catchers lift a knee to reach for the pitch, the pitcher gets two points. If the catcher falls in an effort to get the pitch, the pitcher gets three points.
- Pitchers must keep their point total under five to stay in the game. The catcher counts the number of pitches the pitcher completes before reaching five points, and then the catcher becomes the pitcher and vice versa.
- To make the drill more exciting or competitive for the players, pitchers can be ranked against each other to find the pitcher who completed the most pitchers before reaching five points.
- More: How to Run an Efficient Baseball Practice
- Increasing Difficulty
- Each of these drills can be made more difficult with just a few small tweaks.
- As already mentioned, coaches can increase the distance between players or between the pitcher and the bullseye.
- Coaches can focus on pitching speed, or measuring accuracy against each other pitchers to create some friendly competition.
JIM R0NAI
DIRECTOR OF PHYSICAL THERAPY AND SPORTS MEDICINE AT REHABILITATION ASSOCIATES, INC., STRATFORD, CT
Although baseball is not traditionally considered as a high impact or collision sport, many players between the ages of 10 and 18 who participate in baseball suffer from some degree of musculotendinous contusion, strain or ligamentous sprain.
In organized situations, the majority of these injuries are initially managed utilizing appropriate basic first aid strategies. These include a primary assessment, immobilization of the injured body part, the application of compression to the injured area, elevation of the injured body part when applicable and finally the application of ice.
Many strains, contusions and sprains sustained in baseball are not severe enough to require long term management of a physician or medical professional.
After an initial first aid evaluation, most soft tissue injuries are managed conservatively without further professional medical advice. In these instances, parents, coaches and athletes are left to progress activities and implement the use of thermal agents (ice and heat) as important adjuncts to the healing and recovery process.
During this process, questions and concerns regarding the proper parameters for the use of ice and heat and the transition from one to the other often arise. It is essential that the decision-makers understand the proper use of ice and heat and the effects, both positive and negative, associated with them.
The use of cryotherapy (ice related products) in the management of acute ligament sprains, muscle and tendon sprains and contusions, is a widely accepted method of treatment by sports medicine professionals.
Although most individuals perceive ice and associated cooling agents as uncomfortable, they have been proven effective in decreasing swelling and spasming associated with musculoskeletal injuries.
Pain reduction as a result of the application of ice or other tissue temperature reducing agents often allows the initiation and return of early joint range of motion. Early, normal joint motion patterns promote the realignment and repair of damaged tissues at the cellular level.
The consensus among sports medicine professionals is that ice is most effective when it is applied to injured tissue two to three times per hour during the first 48 to 72 hours following an injury in 12 to 20 minute increments starting as immediately close to the time of injury as possible.
This initial two to three day period or acute phase of the injury is the most critical time when the application of a cooling agent can limit harmful effects of the immune related inflammatory response to injury. This creates a positive impact on an athlete’s overall recovery while decreasing time away from play. Conversely, the application of a heating agent during the 48 to 72 hour acute phase of injury can serve as an irritant and exacerbate a resolving condition.
To avoid the risk of damage to superficial tissues or in stances where an individual is extremely sensitive to cold, use of a thin cotton barrier between skin and ice should be considered. It is also important to take extra precautions when applying in proximity to the ulna nerve, which is located in the medial elbow, and the peroneal nerve located in the lateral aspect of the knee. In both instances, the time of ice application should be closely monitored and the use of an ice barrier is advised.
The range of varieties and prices for ice and ice related products are wide. In most cases, double bagged crushed ice or frozen vegetables conform nicely to most body parts and are inexpensive. Refreezable gel packs are also a good choice. They are relatively inexpensive and easily obtained at most local pharmacies.
Heat and heating agents are not applied to injured soft tissue in an acute situation. Heat is extremely effective during the rehabilitation phase of injury after acute signs and symptoms have resolved. Heating pads, warm whirlpools and moist hydrocolators have been documented as excellent methods of increasing local musculotendinous circulation, promoting muscular relaxation, while enhancing healing of tissues at the microscopic cellular level.
Muscle, tendon, ligament and overall joint flexibility are also increased as a result of higher tissue temperatures. Once an injury has progressed beyond the acute phase, increased blood flow to damaged soft tissue as a result of the application of heat provides them with oxygen and nutrients that are vital to repair and healing.
Safe parameters for use of heat in the absence of any acute signs and symptoms include application in 15 to 20 minute increments as a stand-alone intervention or prior to any gentle range of motion activities. Heat may be utilized one or two times per hour and should not be applied directly to skin except in aquatic situations.
Skin should be draped with a towel or barrier and closely monitored in order to avoid development of excessive redness, mottling or blistering associated with various degrees of thermal burns. There are many easily accessible and inexpensive forms of heat. Warm, moist compresses, microwaveable gel packs, warm soaks or showers and electric heating pads (models with built-in timers recommended), safely and effectively provide the increases in tissue temperature necessary to achieve positive therapeutic effects on healing soft tissues.
As a baseball player’s practice time, game time and overall intensity of play increase, so does their exposure to minor sprains, contusions and strains. In acute situations where injured soft tissue signs and symptoms include redness, swelling, localized temperature increase, pain and loss of function, ice and related cooling products are safest and most effective as mediating these characteristics.
Following the first two to three days of injury when sub-acute injury management and rehabilitation have begun, a transition to the application of heat is beneficial. Should an injury not progressively resolve, the advice of a medical professional should be sought?
Proper use of thermal agents like ice and heat in preventative, acute and rehabilitative situations is an integral component of sports injury management and can ultimately make a difference in when and if an athlete returns to practice and competition.
At the high school level, a great thrower can be the difference between winning and losing.
Throwers can be categorized as pitchers in softball or baseball, quarterbacks in football, field event athletes in track and field, or anyone in a serving sport such as tennis or volleyball. All of these athletes go through the throwing motion of wind-up, cocking, acceleration, deceleration, and follow through. Significant stress is placed on the shoulder and elbow during these phases. We must do everything within our power to reduce the likelihood of injury to these important members of our teams.
As coaches, parents and sports medicine profession¬als, we have a tendency to overlook how many times an athlete actually goes through the throwing motion during practices and games. Therefore, many overuse injuries occur that should and could be prevented by implementing a few simple rules into the conditioning program of the throwing athlete.
A well-planned program is essential to ensure that the risk of injury is decreased and performance is enhanced. There are ten components of this plan:
1. Warm-up: The warm-up program for the throwing arm should last for at least 15 minutes and include activities, which raise the core temperature of the body and a good flexibility program.
2. Gradual Progression: An increase in the activity level should be gradual. The body may require 6-8 weeks to fully reach optimal fitness. Starting a pro¬gram that is advanced may only cause injures. In¬creases should be made as the body accommo¬dates to the demands that are placed upon it. Throwing too much too early can result in trouble later.
3. Timing: Over training is one of the most common ways that injuries occur. When an athlete gets tired or run down, that athlete becomes much more prone to injury. Most of the time over training an arm is worse than under training. Timing is everything!
4. Specialization: A good program will include skills that are needed for the particular sport that the athlete is preparing for. If there is a desire to compete in a specific activity, then training should be structured to meet the demands of that activity. Different demands are placed on baseball pitchers than on softball pitchers and different demands are placed on a quarterback than on a tennis player.
5. Intensity Level: Most of us never workout at our full potential. At lower levels, it takes much longer to achieve top physical condition. At higher levels, the risk of injury is much greater. Quality should always be considered to be more important than quantity of exercise. Minimize the number of throws... maximize the effort.
6. Individuality and Capacity Level: The demands that are placed on the throwing arm should be based on the individual ability and fitness level of the athlete. A body is more at risk if a person tries to perform at a level for which he or she is not prepared. This capacity level may be increased gradually. All conditioning programs should be based on individual needs, goals and capacity levels.
7. Strength, Endurance and Flexibility: These are the building blocks that will help anyone excel at his or her activity of choice, especially for the throwing athlete. These elements are necessary to perform at a high level in any activity. All exercise programs should include exercises, which enhance each of the areas of strength, muscular endurance and flexibility.
8. Motivation: With motivation comes success. An athlete who is not motivated is more prone to injury than a person who has the desire to excel. The athlete should go into a workout with a positive attitude so that time is not wasted and improvement is great. An athlete must decide what will motivate his or her team or self.
9. Skills and Techniques: An athlete should always use the proper skills and techniques in conditioning programs and in the throwing motion. Mechanical issues are a significant problem for most throwing athletes. When an athlete suffers from a mechanical problem, injuries occur. Working on the mechanics of throwing is not fun, but will pay off down the road in competition.
10.Consistency: An athlete should have a plan for a conditioning and throwing program and stick with it. A regular routine must be maintained in order to maintain a high level of physical condition. Consistency will also help avoid injury.
Above all, coaches and parents should make sure that their athlete is ready for the demands that will be placed upon them when practice and competition begin. An untrained, underdeveloped throwing arm with significant stresses placed upon it is a prime candidate for injury.
NATIONAL CENTER FOR SPORTS SAFETY
Controlling the Running Game, we talk about varying looks. Varying looks can be thought of as varying your timing to the plate with runners on base, not necessarily how many times you look at a runner, although that can be considered an element as well.
Pitchers can come up with a number of ways to vary their looks on the mound. To accomplish this, as the pitcher comes set and prepares to deliver the pitch, we can hold the ball for either a count of "1 one thousand, 2 one thousand" or 3-4 "one thousands" or even longer if you wanted to (although someone is likely to call time), while mixing up how many times we physically look at the runner. This is done most often with runners at first or second. Holding the ball for 3-4 "one thousands" can really disrupt the timing of a base runner and also serve to stiffen his legs creating a poor reaction state for the runner. Holding the ball for 3-4 "one thousands" is also a great time to pick, especially with a player on first who is looking to run. At first base this is crucial as we want to limit the jump the runner gets on a straight steal or on contact, thus making scoring position harder to achieve and double plays easier to turn.
Varying your looks with a runner at second is important because if we can limit the jump, the runner will be less likely to steal third or score on a single. We deal with a lot of athletes looking to play at the next level and as you move on in your career, the demand to hold runners and limit runs increases. The truth is, if you can’t hold runners you just won’t be able to pitch in collegiate baseball or other high levels of baseball.
Ryan Armstrong, Head Pitching Coach
Article written and contributed by Kevin Hussey
One of the more frequent requests we get for blog ideas is how to go about building a batting lineup. This is an interesting request as while there are many standard philosophies to building a lineup, there have also been a number of computer modes that have produced the same conclusion - that the make up of lineups has little to no effect on wins over the course of a season.
So having preambled with that, let's say that it does matter and matter a lot. So now what? When building your lineup, there are many different approaches to what is the best method. Every team is made up of different players and different situations which mean there are no right answers, there are only different perspectives. Here are 4 approaches you can take when filling out your own batting lineup:
1 - Batting your best player 1st
Some coaches will use the strategy of batting their best player first even if he does not fit the typical leadoff hitter profile. The reason for this theory is that no matter what happens, your best hitter will always have the most at bats. You will never have a game end with your best hitter on deck questioning whether you should have batted them one spot ahead in the line up. Another advantage to this strategy will be the first pitch of the game. Almost always a pitcher will start the game with a fastball, this will at least give your best hitter one pitch a game that they will have the advantage of almost always knowing what it will be. This may not seem like a big deal, but one pitch can always be the difference in a baseball game.
2 - Batting your best player 4th
Every coach will have to make the decision between batting their best hitter 3rd or 4th. Everyone has their own opinion on what works best but again, every team is different. The advantage to your best player batting 4th instead of 3rd is that their first at-bat will either be with a runner on base or leading off an inning (unless a run has scored). Your best hitter will never be in a situation that their first at-bat will be with 2 outs and no one on base. This will take out the possibility of them hitting in the least opportunistic situation in baseball in their first at-bat, which as a coach is the only at-bat you can really control.
3 - Keeping it consistent
A lot of coaches like to switch the lineup on a regular basis. Some people may not think that’s a big deal but inconsistencies in the lineup can change a batter's mentality. If you keep changing the lineup, you're decreasing the chance that your hitters will be put in a situation they are used to. For example, if you have a kid that hits 2nd in the order, he will often see situations where the lead-off hitter will get on and either try and steal a base or attempt something that other players will not. The hitter will get familiar with that approach and naturally adjust to those situations. If all of a sudden that hitter moves to the 5th in the order, he may see more situations that slower runners will be on base and different expectations are implemented. When hitters get more opportunity to be in the same situation, they have a better chance to be productive.
4 - The safe strategy
The safest strategy to setting a proper lineup is to try and put your most consistent hitters together. Putting together the players that get on base the most followed by the players who make the best contact is probably the safest strategy. Some coaches get caught up trying to put their fastest players at the top of the lineup, but that’s only effective if they can get on base consistently. There’s nothing wrong with putting a faster, less consistent player, in the 9 hole. It’s important to not get caught up in what looks right and try and do what is right.
So there you have it - 4 basic approaches around which you can build your batting lineup. There are many more. In fact, a manager with 16 players on his team has over 4 billion ways he can fill out his order. Yes, 4 billion! But if the statisticians are correct and the make up doesn't matter a whole lot, then go with what you think is correct, what gives your team the best chance to win, and what allows you to concentrate on other areas of the game and not second guess your own lineup.
Good luck!
Keving Hussey--The Baseball Zone
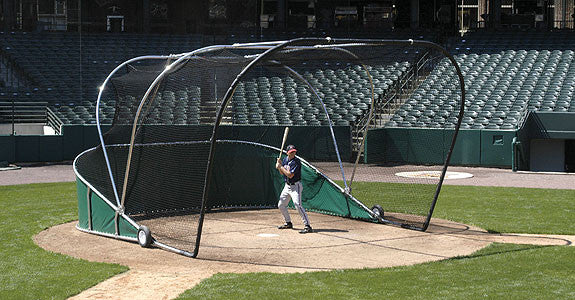
Too many times we think that the cage is only for hitting off the machine or off the pitcher. That is the furthest thing from the truth you should use your batting cage and your pitching machine for other uses. Batting cage should be used for Tee work, soft toss, front toss, short distance batting, throwing drills, then on the defensive side, catchers drills both live in off the pitching machine, fielding drills.
Too many times we forget that all three of the main aspects of baseball, catching, throwing, hitting can be done in the cage with great repetition. Batting cage eliminates a lot of chasing the ball around.
Before somebody says what you can only hit straight on ground balls, think about it that's exactly what you want the player to get in front of the ball and field the straight on ground balls. The ability to do all these drills indicated will transfer to the field.
You can certainly get them done with great repetition and more efficiency if you use the batting cage as part of your total baseball program.