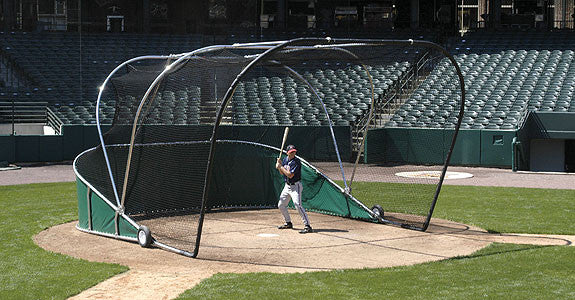
Hitting (Hitting off a Tee)
Favorite part of practice is batting practice, where they get to see how hard and far they can hit a baseball. The problem with batting practice is how kids handle it. A lot of kids see batting practice as a homerun derby with the ball perfectly placed each time (or waiting for a perfectly placed one) and swinging for the fences. When you hit off a Tee, your goals can be made more appropriate for trying to become a better hitter and can be made more realistic to game situations when done correctly. The goal of hitting the ball off the tee is to try and square up the ball as much as possible because almost all results will be the same anyways. Hitting off a tee allows you to forget about your surroundings and concentrating on increasing your strength and using proper technique. Placing the Tee in different locations that represent where an actual ball may be pitched to you - raise and lower the Tee, place it closer to you and further away - can help you learn what adjustments your body will need to make to square up on a ball based on the pitch location.
Ground balls (Using a Wall)
Taking ground balls seems like it would be at least a two person activity but it doesn’t need to be. If you’re in a position where you can only practice by yourself, try throwing yourself groundballs off the wall (among other ideas). You don’t need to have a hard ball to practice this. If you have any type of ball that bounces you can work on almost all the skills involved with picking up a ground ball. You can still learn to read different types of hops while regulating your speed to the ball allowing your body to be in a good fielding position. The best part of throwing a ball off the wall is you can adjust every throw to cater to your defensive needs. The only thing you can’t really simulate is being able to read a ball off the bat, but learning how to get your body in a good fielding position will ultimately help you with that as well.
Pop ups (Using a Tennis Racket)
This is a little easier with a partner, but catching pop ups generally requires a coach that’s capable of hitting pop flies to their target and this can be very difficult for inexperienced coaches and an inefficient use of time. It can make pop ups a lot easier if you try it with a tennis ball and racket. Using a tennis racket and hitting the ball up in the air is a great way to consistently hit pop ups at your target. Along with being able to hit them extremely high and accurate, the tennis ball will be influenced by the wind making it a challenge for the person receiving them. This drill works great for catchers pop ups.
All of these drills will help you practice your skills on your own and are just a few examples of many ways you can work on your own. When trying to become a better athlete, all of your most important work will get done on your own so don't wait for a team practice or a bunch of teammates to get together. Try and find different ways that you can become great at practicing baseball without relying on anyone else.
I'd love to hear about your favorite "solo" drills. Please feel free to share them in the comments below so others can benefit from them.
Kevin Hussey
2 Baseball Pitching Drills for Better Accuracy
Some of the most important baseball pitching drills focus on accuracy and placing the ball where you want it to be.
The following drills challenge athletes to continually improve their ability to get the ball where it's intended to go. Drills can be adjusted depending on the age and playing level of different teams and players.
Baseball Fielding Drill for Kids
- Bullseye In the bullseye drill, players throw the ball into an ever-decreasing bullseye. Coaches should tape off a square bullseye, either into a padded wall or a throwing or batting cage.
- Inside each square, there is a smaller square, with a total of five squares.
- The size of the bullseye depends on the age and playing ability of the team you are working with, but it should be challenging.
- Players must throw three to five balls back-to-back inside the bullseye before the coach removes the outer-most piece of tape, thus decreasing the size of the bullseye.
- The number of back-to-back balls thrown into the bullseye is also a decision the coach makes, depending on the age and playing level of the team.
More: 3 Fun Baseball Drills For Kids
Kneeling Partner Pitches
- Each player needs a partner. Both partners kneel on the ground, both with gloves, but with only one ball. The distance between the players is up to the coach, and can be extended periodically during the drill to make things more difficult.
- Each pair pitches back and forth. The pitch is considered "good" if the catcher does not have to extend his arms out to his sides in order to catch the ball.
- the catchers extend their arms, the pitcher gets a point. If the catchers lift a knee to reach for the pitch, the pitcher gets two points. If the catcher falls in an effort to get the pitch, the pitcher gets three points.
- Pitchers must keep their point total under five to stay in the game. The catcher counts the number of pitches the pitcher completes before reaching five points, and then the catcher becomes the pitcher and vice versa.
- To make the drill more exciting or competitive for the players, pitchers can be ranked against each other to find the pitcher who completed the most pitchers before reaching five points.
- More: How to Run an Efficient Baseball Practice
- Increasing Difficulty
- Each of these drills can be made more difficult with just a few small tweaks.
- As already mentioned, coaches can increase the distance between players or between the pitcher and the bullseye.
- Coaches can focus on pitching speed, or measuring accuracy against each other pitchers to create some friendly competition.
At the high school level, a great thrower can be the difference between winning and losing.
Throwers can be categorized as pitchers in softball or baseball, quarterbacks in football, field event athletes in track and field, or anyone in a serving sport such as tennis or volleyball. All of these athletes go through the throwing motion of wind-up, cocking, acceleration, deceleration, and follow through. Significant stress is placed on the shoulder and elbow during these phases. We must do everything within our power to reduce the likelihood of injury to these important members of our teams.
As coaches, parents and sports medicine profession¬als, we have a tendency to overlook how many times an athlete actually goes through the throwing motion during practices and games. Therefore, many overuse injuries occur that should and could be prevented by implementing a few simple rules into the conditioning program of the throwing athlete.
A well-planned program is essential to ensure that the risk of injury is decreased and performance is enhanced. There are ten components of this plan:
1. Warm-up: The warm-up program for the throwing arm should last for at least 15 minutes and include activities, which raise the core temperature of the body and a good flexibility program.
2. Gradual Progression: An increase in the activity level should be gradual. The body may require 6-8 weeks to fully reach optimal fitness. Starting a pro¬gram that is advanced may only cause injures. In¬creases should be made as the body accommo¬dates to the demands that are placed upon it. Throwing too much too early can result in trouble later.
3. Timing: Over training is one of the most common ways that injuries occur. When an athlete gets tired or run down, that athlete becomes much more prone to injury. Most of the time over training an arm is worse than under training. Timing is everything!
4. Specialization: A good program will include skills that are needed for the particular sport that the athlete is preparing for. If there is a desire to compete in a specific activity, then training should be structured to meet the demands of that activity. Different demands are placed on baseball pitchers than on softball pitchers and different demands are placed on a quarterback than on a tennis player.
5. Intensity Level: Most of us never workout at our full potential. At lower levels, it takes much longer to achieve top physical condition. At higher levels, the risk of injury is much greater. Quality should always be considered to be more important than quantity of exercise. Minimize the number of throws... maximize the effort.
6. Individuality and Capacity Level: The demands that are placed on the throwing arm should be based on the individual ability and fitness level of the athlete. A body is more at risk if a person tries to perform at a level for which he or she is not prepared. This capacity level may be increased gradually. All conditioning programs should be based on individual needs, goals and capacity levels.
7. Strength, Endurance and Flexibility: These are the building blocks that will help anyone excel at his or her activity of choice, especially for the throwing athlete. These elements are necessary to perform at a high level in any activity. All exercise programs should include exercises, which enhance each of the areas of strength, muscular endurance and flexibility.
8. Motivation: With motivation comes success. An athlete who is not motivated is more prone to injury than a person who has the desire to excel. The athlete should go into a workout with a positive attitude so that time is not wasted and improvement is great. An athlete must decide what will motivate his or her team or self.
9. Skills and Techniques: An athlete should always use the proper skills and techniques in conditioning programs and in the throwing motion. Mechanical issues are a significant problem for most throwing athletes. When an athlete suffers from a mechanical problem, injuries occur. Working on the mechanics of throwing is not fun, but will pay off down the road in competition.
10.Consistency: An athlete should have a plan for a conditioning and throwing program and stick with it. A regular routine must be maintained in order to maintain a high level of physical condition. Consistency will also help avoid injury.
Above all, coaches and parents should make sure that their athlete is ready for the demands that will be placed upon them when practice and competition begin. An untrained, underdeveloped throwing arm with significant stresses placed upon it is a prime candidate for injury.
NATIONAL CENTER FOR SPORTS SAFETY
Controlling the Running Game, we talk about varying looks. Varying looks can be thought of as varying your timing to the plate with runners on base, not necessarily how many times you look at a runner, although that can be considered an element as well.
Pitchers can come up with a number of ways to vary their looks on the mound. To accomplish this, as the pitcher comes set and prepares to deliver the pitch, we can hold the ball for either a count of "1 one thousand, 2 one thousand" or 3-4 "one thousands" or even longer if you wanted to (although someone is likely to call time), while mixing up how many times we physically look at the runner. This is done most often with runners at first or second. Holding the ball for 3-4 "one thousands" can really disrupt the timing of a base runner and also serve to stiffen his legs creating a poor reaction state for the runner. Holding the ball for 3-4 "one thousands" is also a great time to pick, especially with a player on first who is looking to run. At first base this is crucial as we want to limit the jump the runner gets on a straight steal or on contact, thus making scoring position harder to achieve and double plays easier to turn.
Varying your looks with a runner at second is important because if we can limit the jump, the runner will be less likely to steal third or score on a single. We deal with a lot of athletes looking to play at the next level and as you move on in your career, the demand to hold runners and limit runs increases. The truth is, if you can’t hold runners you just won’t be able to pitch in collegiate baseball or other high levels of baseball.
Ryan Armstrong, Head Pitching Coach
Catchers_Working_Together
Some teams do not have the luxury of having a coach at baseball practice for every position. Often times what happens is the coaches will be with the pitchers, infielders and outfielders, while the catchers are stuck catching balls for the infielders. If this is the case, you need to teach the catchers how they can coach themselves.
When catchers practice their skills, they shouldn’t practice anything for more than 10 minutes unless they‘re learning a new skill. The best way for a catcher to practice individual skills is 5-10 minutes at a time. Catchers can work on receiving, blocking and throwing, all for 5-10 minutes a practice. All of these skills can be practiced without the assistance of a coach. All that is needed is two or more catchers to work with each other.
Here are some drills that can be practiced every day:
Receiving
- Flip balls inside and outside so catchers can work on shifting their body and receiving the ball (With or without a glove)
- Throw from 25-30 feet away, working on sticking pitches
- Rapid fire 5-6 pitches in a row, working on catchers' reflexes and reacting to balls quickly
Blocking
- Dry blocking without a ball just going down and working on the perfect form
- Blocking pitches thrown from 15-20 feet away middle, left and right
Throwing
- Play catch just working on the transfer from glove to hand
- Flip balls from 15-20 feet away and catchers work on footwork to each base
- Roll out bunts and work on footwork to each base
There is time available in almost every practice for your catchers to get this work in, so as a coach you need to make sure they are doing so, whether they have a dedicated coach or not. Catchers will get more out of doing skills every day for less time, rather than once or twice a week for a half hour or more. And they will certainly get more out of their practices if they are wokring on their own skills and game instead of just simply "being there" to catch balls for their teammates.
Kevin Hussey
Too many times we think that the cage is only for hitting off the machine or off the pitcher. That is the furthest thing from the truth you should use your batting cage and your pitching machine for other uses. Batting cage should be used for Tee work, soft toss, front toss, short distance batting, throwing drills, then on the defensive side, catchers drills both live in off the pitching machine, fielding drills.
Too many times we forget that all three of the main aspects of baseball, catching, throwing, hitting can be done in the cage with great repetition. Batting cage eliminates a lot of chasing the ball around.
Before somebody says what you can only hit straight on ground balls, think about it that's exactly what you want the player to get in front of the ball and field the straight on ground balls. The ability to do all these drills indicated will transfer to the field.
You can certainly get them done with great repetition and more efficiency if you use the batting cage as part of your total baseball program.